Garden Journal for Kids (Printable)

garden journal for kids (printable)

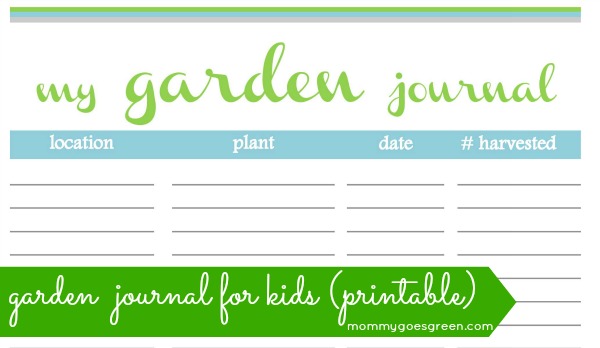
I thought it would be fun to keep track of everything we harvest from our garden this summer so I created this printable for us to use. Feel free to print and use with your kids, too!

Posted at Small Footprint Fridays


Eco-Friendly Weed Control

weed

I finally feel like we’ve moved successfully from conventional products to eco-friendly products in our lawn and garden.  The icing on the cake was finding a safe way to control our weeds:

  1. Water plants, not weeds.  We turned off the sprinkler heads in our garden beds and used a sprinkler head conversion kit to install a drip system.  It’s inexpensive and very easy to install.  Each drip is set to only water plants, flowers and trees, where necessary.  The rest of the bed doesn’t get watered, saving water (and $$) and keeping weeds down.
  2. Use a thick layer of mulch or bark.  We’ve spread mulch too thinly for the past couple summers.  At only 1-2 inches, it thinned out quickly and disappeared before summer was over. It didn’t help with weed control.  This summer, we spread it 3 inches thick and it has made a huge difference.  Mulch also helps keep your water needs down (and $$) as it reduces evaporation by up to 50%.
  3. Plant drought tolerant ground cover.  Ground cover acts similarly to mulch so it covers the dirt, keeping weeds down and reducing evaporation.  By choosing drought tolerant ground cover, you further reduce your water needs.
  4. Use a weed killer, if necessary.  The final piece of our eco-friendly weed control puzzle was finding a weed killer that worked and WE. HAVE. FOUND. IT.  EcoSmart contacted me to see if I would check out a few of their new products and I was excited to try out their Organic Weed & Grass Killer.  I just hoped it worked and it does!   We have some weeds in a rocky area that are hard to hand pick so I started there.  It was a hot day and I sprayed all the weeds in the morning.  By afternoon, all the weeds were shriveled up and dead!  {I did a little happy dance} 

So the good news is that you don’t need a big bottle of Roundup to kill weeds particularly because I’m not convinced on any level that Roundup is safe.  For example, scientists in France evaluated the toxicity of Roundup on fetal umbilical cord cells. They found that every formulation of Roundup caused total cell death within 24 hours.  And they weren’t even testing with agricultural levels of Roundup, they were using levels that would be found in food or feed.   Roundup has also been linked to non-Hodgkin’s lymphoma.  If you think you are safe using it in your yard, did you know that it’s half-life is at least 47 days?  It also contaminates surface waters and is not readily broken down by sunlight or water.  Scary stuff, just say no.  Promise you, EcoSmart works just as well.  If I get one reader to stop using Roundup, I’ll feel better 🙂


Organic Lawn Care


A couple years ago we ditched the Round Up and chemical filled fertilizer for more eco-friendly alternatives.  It has taken some time to figure out how to maintain our lawn without chemicals but this summer we’ve found some great methods that are doing the job. I know it would be more eco-friendly not to have a lawn at all but we have two young children who love to run barefoot through it.   It doesn’t take any more effort than conventional methods to have a safer, eco-friendly lawn. 

  1. Know how much water your lawn needs.  Your lawn only needs 1 inch of water a week and preferably, all at one time.  This way the water gets down to the deep roots.  To determine  how much water your lawn needs,  put an empty tuna can in the middle of the yard.  Turn on the sprinklers and record how long it takes to fill the tuna can up. Once you know how long it takes, set your sprinkler system to water 1x per week for that length of time.  Remember, different parts of your lawn may need different amounts of water.  We water 30 minutes, 1x per week in our front yard and 1 hour, 1x per week in our back yard.
  2. Don’t waste water.  Water in the morning.  If you water during the day, it evaporates before it hits the ground. We start our watering process at 5am.  If you have a sprinkler system, turn it on and watch how each sprinkler head is functioning.  Is it overwatering by spraying sidewalks or driveways?  Do you have too many sprinkler watering the same area?  The spray area on each sprinkler head can be modified, usually with a screwdriver applied to the top.  We have turned off about 25% of our sprinkler heads totally because they were watering areas that weren’t planted yet or were overlapping with other sprinkler heads too much.
  3. Don’t mow too short.  Keeping your lawn about 3 inches long
  4. Use free fertilizer.  By leaving your grass clippings on your lawn, you reduce your fertilizer needs by 25%.  To keep our garden beds grass clipping free, we bag the grass clippings while mowing and then empty the bag back onto our lawn.  You also reduce your trips to the recycling center to take grass clippings.
  5. Get chicken manure.  According to SafeLawns.org, chicken manure is the best fertilizer so we picked it up.  This is the product that has made the biggest difference for our lawn.  It took a thin, yellow lawn and made it lush, thick and green in about a week.  As long as we remember to use it every month, the lawn is awesome.  We buy chicken fertilizer at Lowe’s – it’s not any more expensive than conventional fertilizer and it contains no chemicals.   SafeLawns recommends one called Chickity Doo DooEDITED TO ADD:  We don’t use plain chicken manure, it’s an organic fertilizer where the primary component is chicken manure!

Using these methods, we’ve saved money on our water bills and have a safe lawn that I feel totally comfortable having my children play on.  For more tips, I highly recommend checking out SafeLawns.org.

Check in tomorrow for tips to keep your garden beds organic AND weed-free!


This is part of the Healthy Child Blog Carnival – an effort by Healthy Child Healthy World to help inspire a movement to protect children from harmful chemicals.  For great posts from other green mamas, check some of them out!


Planning Your Summer Vegetable Garden

Spring is slowing making its way through the Northwest and I’m getting excited to plant my vegetable garden.  Depending on where you live and what you are planting, you may have already started planting.  I generally plant starts so I likely won’t plant anything for another couple weeks. Last year, I didn’t get anything in the ground until the end of May (which was a little late) but I ended up having a great garden anyway!  

If you’ve never had a vegetable garden, I highly recommend that you start one this summer – it’s easy and a great project to do with your kids. 

CONTAINER AND LOCATION
It can be as easy as using a pot for one tomato plant or you can buy or build raised beds.  The first summer that I grew anything, it was one tomato plant in a pot .  The next summer, my husband built me a raised bed for Mother’s Day.  Raised beds can be as small or large as you have space for.  Ours is long and narrow – 3 x 11 – between the edge of our grass and the fence.  Often, the container where you keep your vegetables will be highly influenced by the location you have available with LOTS of sun – preferably 6-8 hours a day.  

SOIL
Once you choose a container and location, start with some great soil.  We have a compost bin that we stock all year just to use when planting our vegetable garden.  If you don’t have a compost bin, you can purchase compost and/or soil mixes to use. 

CHOOSING VEGETABLES
One of my favorite things about my garden is experimenting.  I am NOT a gardener and I don’t have a green thumb.  I just try new things each year to figure out what works and what doesn’t.  The first summer I learned that we eat way more cherry tomatoes than plum tomatoes.  Last summer I planted more celery than we could eat.  I couldn’t give away all the jalapeno peppers we had and I planted beans and peas way too late to get anything out of them.  When choosing vegetables to plant, choose ones that you and your kids will eat.  Tomatoes, cucumbers, and zucchini are all easy to grow and you’ll get LOTS of them – with just one plant.  Talk to the growers at the local nursery or farmer’s market – they are a wealth of information about the different varities of every vegetable.  

WATER  
I tend to kill anything that isn’t automatically watered so we put a drip system in our raised bed. It was inexpensive and easy to hook up through our automatic watering system. You could also use a soaker hose or just get out there and manually water every day. 

THE FRUITS OF YOUR LABOR 
The very best thing about our garden is picking fresh, organic vegetables with my daughter every evening in late summer.  She loves to take juicy, red Sweet 100 cherry tomatoes off the vine and pop them in her mouth.  She’s learning (even at age 3) where our fresh food comes from and she’ll eat anything we grow in those garden boxes.  And if you’ve been watching Jamie Oliver’s Food Revolution, you know that’s a lesson she won’t be learning in school.  

For additional resources on planning your vegetable garden, check out Martha Stewart’s Vegetable Garden Guide or Better Homes and Gardens Edible Gardening Guide.


Versatile Vinegar – My Favorite Uses

You often see vinegar used in DIY cleaning solutions but vinegar is an amazing product that can be used in many more applications than cleaning and it’s so inexpensive – try out a few of my favorite uses

  • Cleaning your coffee pot
    White distilled vinegar can help to dissolve mineral deposits that collect in automatic drip coffee makers from hard water. Fill the reservoir with white distilled vinegar and run it through a brewing cycle.  Rinse thoroughly with water when the cycle is finished. (Be sure to check the owner’s manual for specific instructions.) Works great!
  • Kill Weeds
    Spray white distilled vinegar full strength on tops of weeds. Reapply on any new growth until weeds are dead.  We tried this and found that some weeds fell over dead and a few couldn’t have cared less. I just pick those.
  • Freshen Baby Clothes
    The addition of 1 cup of white distilled vinegar to each load of baby clothes during the rinse cycle will naturally break down uric acid and soapy residue leaving the clothes soft and fresh. I particularly use vinegar on anything with urine on it.
  • Glass Front Fireplace Doors
    Wash fireplaces with a 50/50 ratio of water and white distilled vinegar to remove the blackened soot on glass front doors. If the doors have a spring-loaded clip, remove it, then take out the doors. Lay them flat on newspapers, spray with the vinegar/water solution and soak. Wipe it off with newspaper. I’ll be using this once we turn off the pilot light on our gas stove for the summer.
  • Freshen a Lunch Box
    It is easy to take out the heavy stale smell often found in lunch boxes. Dampen a piece of fresh bread with white distilled vinegar and leave it in the lunch box overnight. This is my new favorite vinegar use- it’s so hard to keep my daughter’s lunch bag smelling good!
  • Make a Volcano Explode
    First, make the “cone” of the volcano. Mix 6 cups flour, 2cups salt, 4 tablespoons cooking oil and 2 cups of water. The resulting mixture should be smooth and firm (more water may be added if needed). Stand a soda bottle in a baking pan and mold the dough around it into a volcano shape. Do not cover the hole or drop dough into it. Fill the bottle most of the way full with warm water and a bit of red food color (can be done before sculpting if you do not take so long that the water gets cold). Add 6 drops of detergent to the bottle contents. Add 2 tablespoons baking soda to the liquid. Slowly pour vinegar into the bottle. Watch out – eruption time! How cool of a mom would your kids think you were!
  • Vomit in Car
    Remove the leftover odor after a rider has been carsick by leaving a bowl of white distilled vinegar overnight on the floor. Hasn’t this happened to every mom?  It’s SO hard to get that smell out, particularly on hot days.
  • Clean Vegetables
    Get rid of expensive ‘veggie washes’ and use vinegar, particularly for non-organic produce.
  • Deter ants. Discourage ants by spraying undiluted white distilled vinegar outside doorways and windowsills, around appliances and wherever you find the pests coming in. These pesky critters often move in unannounced and next time I will be welcoming them with this great tip!
  • Remove sticky residue.  To remove the sticky residue from bumper stickers on your car, price tags on a new product or stickers your 2 year old put all over your window ( a recent development at my house ), use full strength vinegar.  This works great and replaced my bottle of Goo Gone (saving money and the use of more chemicals than we actually needed ).

For many more tips, visit The Vinegar Institute ( yes, one exists ) for their Vinegar Tips and Tricks Guide or VinegarTips.com for 1001 vinegar tips and tricks.

Vinegar is so versatile – what are YOUR tips for using it?