Physician’s Formula Organic Wear Makeup

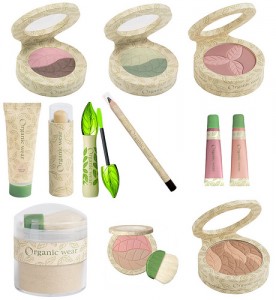
I’m not a big makeup girl – I use a few basic products and I tend to stick to what I like – I don’t venture out to new products very often. Recently, I decided that I needed to find safer, paraben-free makeup products but I didn’t want to spend the time (or a lot of money) testing new products. I’ve been using Physician’s Formula Organic Wear tinted moisturizer for a year– I use it daily because it has light coverage, it moisturizes AND has SPF 15. Basically it’s a great all-in-one which is perfect for a mom with limited time on her hands. I highly recommend it.

Since I liked that product so much, I decided to try out the other products in the Physician’s Formula Organic Wear line. To sweeten the deal, I made sure that the store I purchased them from had a return policy that allows you to try out a new product and return it if you don’t like it – thank you to Fred Meyer! I got the eyeliner, mascara and lip gloss.

The eyeliner is exactly how I like them – soft, thick pencil tip – goes on easily and stays on all day. I’m sticking with this one.

I’ve been buying the same brand of mascara for 10 years and love it but I know it has junky ingredients. It’s going to be hard to replace. The Physician’s Formula Organic Wear mascarahas an interesting wand – like nothing I’ve seen. If you like your eyelashes defined and thin layers of mascara – this is perfect for you. It’s never chunky or goopy. It works fine for me for every day – but I do have to put on multiple layers. If I was going out at night – I might go back to old faithful until I find another brand.

As for the lip gloss – I returned it to the store. I love lip gloss but when I put this on, I flashed back to the 80’s with my frosted, glossy lips. I’m on the lookout for another brand.

What are your favorite makeup brands?


Waste Free Lunches

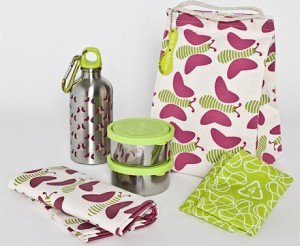
Tonight, as I was packing my daughter’s lunch, I realized that without even thinking about it, I was packing a waste free lunch.  Just by keeping a couple things on hand at all times, it has become second nature.  Most of these things you probably already have, it’s just getting into the habit of using them every day. If you are missing a few things, I’ve provided some of my favorite options.

LUNCHBOX – When I was in school, we used paper bags for our lunch everyday.  I cringe when I think of how many of them we just threw away.  Now, I pack my kid’s lunch in a reusable lunchbox.  There are tons of options like the PlanetBox Stainless Steel lunchbox, old school metal lunchboxes, plastic bento style lunchboxes,  or theKids Konserve insulated lunch sacks made from recycled bottles.  Just make sure that whatever you buy is PVC Free – oftentimes you’ll find that fabric lunchboxes have a PVC lining – check the tags.

REUSABLE BAGS – This is one of the places where you can really cut down on waste, particularly if you are using plastic baggies for sandwiches and snacks.  Lunchskins makes reusable bags both in sandwich and snack sizes.  They are made with a cotton fabric that is coated with a food-safe polyurethane liner.  I currently have 2 but am planning to get several more because I’m always using them!  I can use them for more than just food and I love that I can throw them in the dishwasher.

REUSABLE CONTAINERS – Another way to replace your plastic baggies is to use a reusable container.   It can be as easy as using a plastic container, stainless steel Lunchbots or Kinderville silicone storage jars

UTENSILS – For older children, you can grab a  fork and/or spoon from your silverware drawer.  If you’re concerned they might not make it home, stop by Goodwill and pick up some 10 cent utensils for lunches.  No worries if it accidentally is left at school (dirty. in the locker. never to be seen again.).  For younger children, buy kid-size plastic or metal utensils that are the right size for their mouths.  We use metal utensils from Pottery Barn Kids and have been really happen with them.

CLOTH NAPKIN – Paper napkins may be cheap but they are also wasteful.  We’ve been using cloth napkins for a year and they aren’t any more work – I just throw them in any load of laundry that is being done. 

DRINK BOTTLE -It seems like everyone has jumped on the stainless steel drink bottle bandwagon, but if you haven’t – now is a good time.  You can find them EVERYWHERE – we happen to use KleanKanteen for our kids but you can pick them up anywhere from Starbucks, to the grocery store, to toy stores.

Once you start packing your own waste free lunches, you might inquire about a school wide program. It has been estimated that on average a school-age child using a disposable lunch generates 67 pounds of waste per school year.   That is over 800 pounds of waste over 12 years of school – JUST FOR 1 CHILD!  That equates to 18,760 pounds of lunch waste for one average-size elementary school – PER YEAR!  Over 225,000 pounds of lunch waste over 12 years of school.  For a great resource to help you start a waste free lunch program at school, visit WasteFreeLunches.org.


DIY Freezer Pops

This post was originally posted by Stephanie Lynn on her blog, Under The Table and Dreaming.

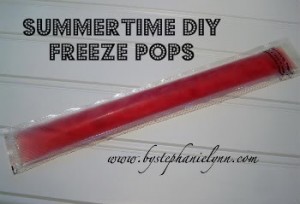
Nothing like a quick and easy ice cold treat to cool you down on a hot summer day. As a kid freeze pops were a summertime staple ~ we loved them and my mom always had them on hand. I still enjoy a good ole’ icy pop, {blue would be my favorite} however I needed to come up with a healthy alternative now that I am more conscious about what’s going into my little guys body. Sure it is less expensive to buy a gigantic box of these at your grocers, but most are packed with high fructose corn syrup and artificial flavors and dyes. By making your own you’re in complete control of what’s inside and you can even sneak in some added nutrients and vitamins as well! I have a set of reusable pop makers {which are probably a bit greener to use} but sometimes it’s nice to be able to give my son a treat that looks like what the other kids are carrying around instead of always telling him it’s something he can’t have.

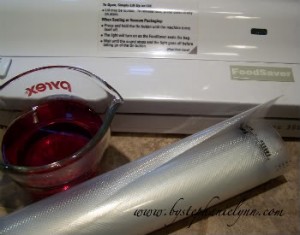
To make your own freezer pops you’ll need a food sealer {I used my FoodSaver Vacuum Sealer}, 8 Inch wide roll of packaging, and fruit/vegetable juice of your choice. From the roll of packaging I cut a strip measuring 2 1/2 tall. {the roll itself is 8 inches wide}.

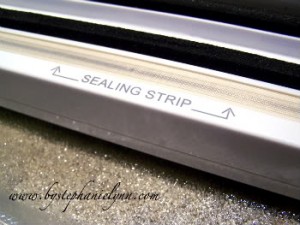
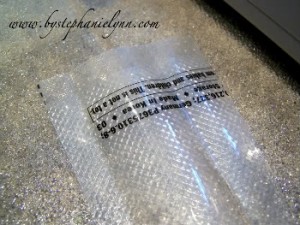
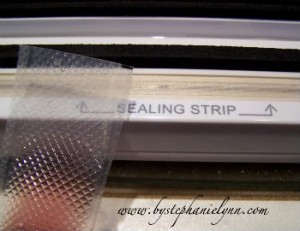
You are actually only going to use the ‘sealing strip’ for this, as you do not need to vacuum seal these shut. Lay your cut piece of packaging on the sealing strip and seal one side, then flip over and seal the other.

Since the edges of the packaging already come sealed you should now have a complete enclosed rectangle.


Cut one end off…

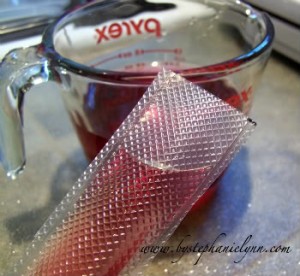
…and fill with juice. {I used a mix of organic juice and water for these} Organic vegetable juice or homemade purées are also favorites. If my son didn’t have allergies I would definitely make some using yogurt or pudding. {yummy}

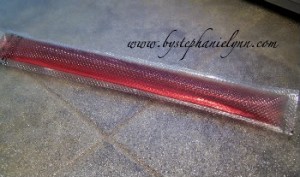
Carefully holding the pop upright, the last thing to do is seal the open end back up. I put the Food Saver close to the edge of the counter so the pop could hang vertical and simply bent the top over to seal.


FINISHED PROJECT!!


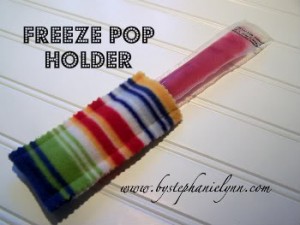
Just to complete this great project, you can make Stephanie’s Freezer Pop Holders – keep those little fingers warm!


Planning Your Summer Vegetable Garden

Spring is slowing making its way through the Northwest and I’m getting excited to plant my vegetable garden.  Depending on where you live and what you are planting, you may have already started planting.  I generally plant starts so I likely won’t plant anything for another couple weeks. Last year, I didn’t get anything in the ground until the end of May (which was a little late) but I ended up having a great garden anyway!  

If you’ve never had a vegetable garden, I highly recommend that you start one this summer – it’s easy and a great project to do with your kids. 

CONTAINER AND LOCATION
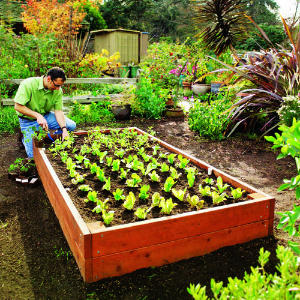
It can be as easy as using a pot for one tomato plant or you can buy or build raised beds.  The first summer that I grew anything, it was one tomato plant in a pot .  The next summer, my husband built me a raised bed for Mother’s Day.  Raised beds can be as small or large as you have space for.  Ours is long and narrow – 3 x 11 – between the edge of our grass and the fence.  Often, the container where you keep your vegetables will be highly influenced by the location you have available with LOTS of sun – preferably 6-8 hours a day.  

SOIL
Once you choose a container and location, start with some great soil.  We have a compost bin that we stock all year just to use when planting our vegetable garden.  If you don’t have a compost bin, you can purchase compost and/or soil mixes to use. 

CHOOSING VEGETABLES
One of my favorite things about my garden is experimenting.  I am NOT a gardener and I don’t have a green thumb.  I just try new things each year to figure out what works and what doesn’t.  The first summer I learned that we eat way more cherry tomatoes than plum tomatoes.  Last summer I planted more celery than we could eat.  I couldn’t give away all the jalapeno peppers we had and I planted beans and peas way too late to get anything out of them.  When choosing vegetables to plant, choose ones that you and your kids will eat.  Tomatoes, cucumbers, and zucchini are all easy to grow and you’ll get LOTS of them – with just one plant.  Talk to the growers at the local nursery or farmer’s market – they are a wealth of information about the different varities of every vegetable.  

WATER  
I tend to kill anything that isn’t automatically watered so we put a drip system in our raised bed. It was inexpensive and easy to hook up through our automatic watering system. You could also use a soaker hose or just get out there and manually water every day. 

THE FRUITS OF YOUR LABOR 
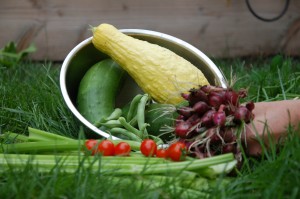
The very best thing about our garden is picking fresh, organic vegetables with my daughter every evening in late summer.  She loves to take juicy, red Sweet 100 cherry tomatoes off the vine and pop them in her mouth.  She’s learning (even at age 3) where our fresh food comes from and she’ll eat anything we grow in those garden boxes.  And if you’ve been watching Jamie Oliver’s Food Revolution, you know that’s a lesson she won’t be learning in school.  

For additional resources on planning your vegetable garden, check out Martha Stewart’s Vegetable Garden Guide or Better Homes and Gardens Edible Gardening Guide.


Eco-Friendly Potty Training

Debate after debate exists about using disposable vs. cloth diapers but I think all parties would agree that the most eco-friendly (and cost effective)  option is to get kids out of diapers as soon as you can.  Fortunately we’re done potty training our first child but we’ll be back there again in a couple years.  I’m surprised there aren’t more eco-friendly potties out yet but I have noticed that one or two plastic potties that are recyclable – a step in the right direction.  Here are the most eco-friendly potty training finds on the web:


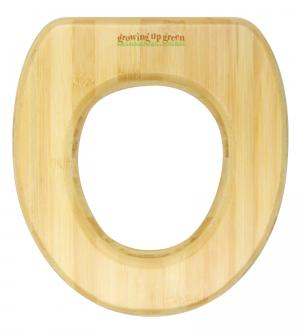
Growing Up Green Bamboo Potty Seat – Made with pesticide-free, 100% sustainable bamboo.


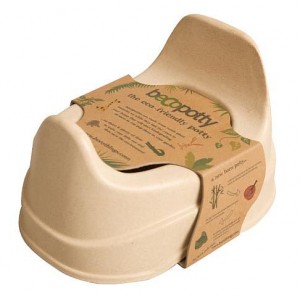
becoPotty – Instead of yet anotherpiece of plastic children’s gear, the becoPotty is made with bamboo and rice husks left over from farming.  When you are done potty training, you can bury it in your garden, plant some seeds and let the natural product biodegrade.


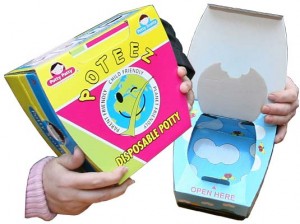
Poteez Disposable Potty– Great for parents on the go, this disposable potty is made with 100% compostable, biodegradable cardboard.


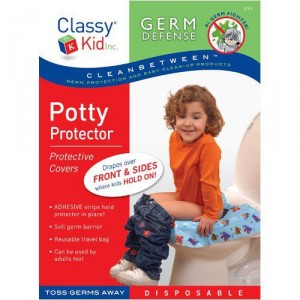
Clean and Green Public Potty Protectors– Disposable toilet seat covers made of 100% biodegradable cotton.  Over sized so little hands don’t touch dirty toilets.


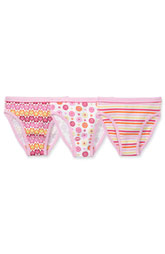
Organic Cotton Training Pants and Underwear – Hanna Andersson has both training and classic “unders” in 100% organic cotton for boys and girls.